
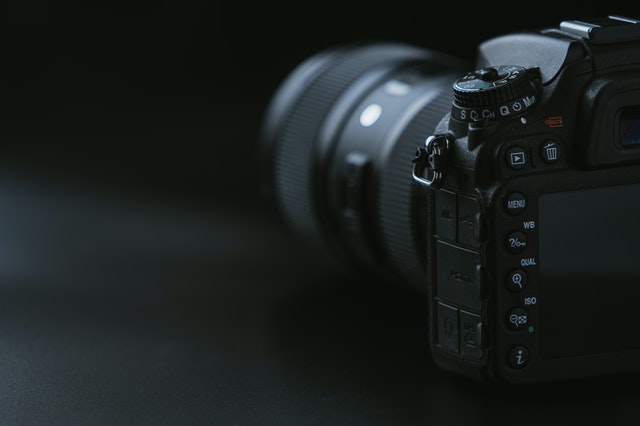
Jūsų fotoaparatas veikia nebetinkamai ar išvis nustojo veikti? Nesvarbu, ar tai mechaninis gedimas, sugedęs objektyvas, ar programinės įrangos problema – mūsų patyrę meistrai pasiruošę padėti!
Kodėl rinktis mus?
✅ Patirtis ir kompetencija – remontuojame visų gamintojų fotoaparatus: Canon, Nikon, Sony, Fujifilm, Panasonic, Olympus ir kitus
✅ Greita diagnostika – gedimo priežastį nustatome per 1-2 darbo dienas
✅ Skaidrios kainos – tikslią remonto kainą sužinosite prieš pradedant darbus
✅ Garantija darbams – visiems atliktiems remonto darbams suteikiame garantiją
Atliekami darbai:
- 📷 Objektyvų remontas ir valymas
- 🔧 Užrakto mechanizmo keitimas
- 💧 Drėgmės pažeistų fotoaparatų atstatymas
- 🖥️ Ekranų ir vaizdo ieškiklių keitimas
- ⚡ Akumuliatorių lizdų remontas
- 🧹 Matricų ir jutiklių valymas
- Repair of all types of lenses
- Repair of flashes
- Repair of video cameras
Patogiai pasiekiami visoje Lietuvoje
Mūsų paslaugos prieinamos Vilniuje, Kaune, Klaipėdoje ir Šiauliuose.

- Vilnius – Kareivių g. 11A “RIMI” +370-655-77057
- Kaunas – Savanorių pr. 155 +370-639-69600
- Klaipėdoje – Sausio 15-osios g. 13 +370-647-07741
- Šiauliuose – Gegužių g. 30 “Arena” +370-682-29052
Teikiame tiek programinio, tiek techninio pobūdžio paslaugas. Keičiame sudužusius ekranus. Remontuojame aplietus ar išsmėliuotus aparatus. Perrašome / perprogramuojame programas (firmware, software). Perlituojame įvairius komponentus, keičiame detales. Taisome išlaužtus lizdus. Prieš atlikdami remonto darbus, atliekame diagnostiką. Jeigu reikia, išrašome defektinius aktus draudimui.
Camera repairs - the most common customer problems
Here's a list of the most common problems our customers encounter.
1. The camera focuses poorly or not at all
There are several reasons why a camera may have difficulty focusing or may not focus at all.
The first of these is light. Most camera focusing systems need a certain amount of light to work properly. If it's too dark, the camera won't be able to focus. If the camera won't focus and you're in a dark environment, try turning on the flash or using an additional flashlight to illuminate the subject so that the camera can focus the image. If your camera has a night mode, turning it on may help.
Jei fotoaparatas nesufokusuoja tamsioje aplinkoje, galima pabandyti perjungti į rankinį fokusavimą. Dauguma DSLR fotoaparatų, o taip pat ir kai kurie kompaktiniai fotoaparatai palaiko rankinio fokusavimo funkciją. Jei jūsų fotoaparate ši funkcija yra, ją galite įjungti kaip fotoaparato nustatymų meniu parinktį arba naudodami jungiklį ant objektyvo.
Darkness is not the only reason. There are certain scenes that are always difficult for the camera to focus on. This is usually the case when trying to focus on something that is uniform in colour, with no edges or points of contrast. If you try to focus on a monochrome blue sky with no clouds, or a featureless surface, you may struggle. This is because the focusing mechanism needs something to focus on.
To solve this problem, try focusing on something, like a cloud in the sky or a texture in a scene. You can always focus on something that is a similar distance from the object and then refocus on the image. This is especially easy if you can take advantage of the pre-focus feature. Again, if the camera is struggling to focus and you can't find an item to focus on in your scene, don't forget that you can switch to manual focus.
DSLRs or other cameras with interchangeable lenses may have a focus switch on the lens. Otherwise it may be on the camera body or somewhere in the settings menu. Check that you haven't accidentally switched autofocus off.
Tačiau jei nei vienas iš aukščiau paminėtų patarimų nepadeda, tikėtina, kad susidūrėte su techniniu gedimų.
2. The captured image is blurred or blurred
One of the most common problems with cameras is blurry / blurry photos. There are two reasons why photos can be blurry. The first is that the image has not been properly focused. See the previous tip on how to fix focus problems. Another common reason is that the camera shutter speed is set too low.
All cameras have a shutter that opens and closes when you press the shutter button to take a photo. The general rule is that when there is less light, the shutter opens for a longer period of time and when there is more light, the shutter opens for a shorter period of time. Especially in dark environments such as evening, night or indoors, the camera may set a relatively slow shutter speed. In this situation, slow means slower than about 1/60th of a second.
While 1/60th of a second sounds quite fast, it is not fast in photographic terms. That's because you can't hold the camera in your hands completely still. Your hands will always be moving, albeit slightly.
At shutter speeds of 1/60th of a second or less, these small movements mean blurry images. The lower the shutter speed, the more hand movements will be captured and the blurrier the images will be.
But shutter speed isn't the only control you have over the camera - you can also change the aperture setting or ISO setting. If you increase the aperture or increase the ISO, you can increase the shutter speed.
Finally, if the light is so low that you can't adjust the camera settings to compensate, you still have two options. Firstly, you can try using the flash. Unfortunately, most built-in flashes on cameras don't work well, but it's probably better than a dark and blurry image. Secondly, if you are somewhere where you can use a tripod, this will solve the problem of blur caused by hand movements. Placing the camera on the tripod will stabilise it and you can shoot as slowly as you like without fear of hand movements causing motion blur.
Jei patarimai nepadeda, greičiausiai susidūrėte su fotoaparatų gedimu. Tačiau nesijaudinkite, nes „TechRemontas” meistrų atliekamas fotoaparatų remontas yra ypač profesionalus ir kokybiškas.
3. Pictures taken by the camera are too bright or too dark
Esame turėję klientą, kuriam jo visiškai naujas fotoaparatas veikė netinkamai, o garantinis centras primygtinai teigė, kad su fotoaparatų viskas gerai. Tačiau visos jo padarytos nuotraukos buvo pernelyg ryškios. Fotoaparatas iš esmės buvo tarsi netinkamas naudoti. „TechRemonto” meistrai peržiūrėjo fotoaparato nustatymus ir paaiškėjo, kad klientas vis įjungdavo funkciją, vadinamą ryškumo kompensavimu (exposure compensation). This is a really useful feature that can help you quickly control how dark or light your image is. However, if you accidentally turn it on or forget to turn it off after use, it will affect all your photos in the future. Brightness compensation is a feature that can be found on almost all cameras, from smartphones and point-and-shoot cameras to SLRs and DSLRs.
When you compose a photo, the camera usually calculates the amount of light in the scene and sets the appropriate values for the various settings to ensure that the image is at the right brightness - not too bright and not too dark. But sometimes the camera doesn't get it quite right. Instead of manually changing various settings, you can simply use the brightness compensation function to quickly tell the camera to make the image lighter or darker.
On most cameras, this function is accessed via a button that looks like "-/+". In fact, it is just a positive and negative sign next to each other. By pressing this button it should be possible to increase or decrease the brightness compensation. The end result is that the image taken with the camera will be lighter or darker.
Kituose fotoaparatuose, ypač išmaniuosiuose telefonuose, gali būti tik ryškumo slankiklis, kuris atlieka tą patį. Kai kuriuose fotoaparatuose ryškumo kompensavimas netgi turi specialų ratuką, todėl jį dar lengviau greitai sureguliuoti. Tačiau šias problema gali sukelti ir techniniai gedimai.
4. Certain parts of the image are too light or too dark
This is usually the case when bright skies are in the darker foreground, for example on city streets. It can also happen on cloudy days when the sky doesn't look too bright to our eyes, but when the photo is taken, the sky is very bright and the rest of the photo is too dark to be usable. This is due to something called dynamic range. Dynamic range refers to the difference between the lightest and darkest parts of a scene. A higher dynamic range means that the camera can capture more light and dark areas.
Most cameras have a dynamic range much smaller than that of the human eye. Therefore, when we take a photo, the image captured by the camera may not look as our eyes see it. Our brains are able to process a wider dynamic range, so light skies and dark foregrounds are still distinguishable to our eyes. Unfortunately, the same cannot be said for our cameras.
So what can you do about it?
The first option is the camera's brightness compensation function, which we mentioned in the tip above. This will allow you to adjust the photo so that the subject is properly represented, while other parts of the image are still too dark or too bright.
Another option is post-processing with layout software or HDR. Most cameras these days have a so-called HDR mode. HDR means High Dynamic Range (high dynamic range). HDR mode works by quickly taking multiple images when the shutter button is pressed. These images are taken under different lighting conditions to increase the overall dynamic range. They are then combined to create an image that should be closer to what your eye sees.
Tačiau tai gali įtakoti ir techniniai fotoaparato gedimai. Tad jei susidūrėte su vienu ar kitu fotoaparato gedimu, „TechRemontas” meistrai atlieka ypač profesionalų ir patikimą fotoaparatų remontą. Contact us today for a quick diagnosis and problem resolution.
